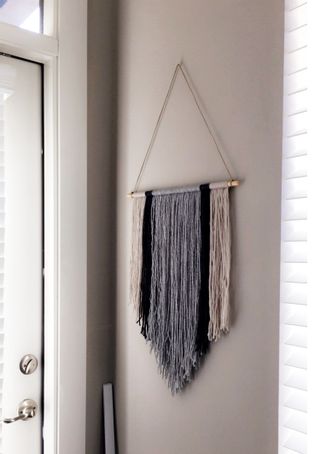
Hey, y'all! I'm not even going to apologize for not posting in forever and cut to the chase. We all know your girl is not a real blogger LOL. Last weekend, I finally got around to making some of the wall decor I've been wanting to put up in the apartment. That's right. I said make. It's honestly not that big of a deal, but if you know me at all, you'd know that I don't have very many DIY success stories. So for me to want to share this, just know that it's super easy and more importantly, super cute!
A quick Google search for yarn (or the more sophisticated/actual thing, macrame) wall hangings will result in some really beautiful, complicated, but also really expensive options. As someone who prefers #BallinOnABudget, I decided to take a crack at making some simple ones myself. All of the materials can be bought for less than $20 at Michael's and Jo-Ann, so it's really inexpensive, too. I know there are tons of DIY tutorials out there, so I don't claim to be the first in anyway, but I kind of winged this myself so if you wanna know how I made mine, read on!
What you'll need #
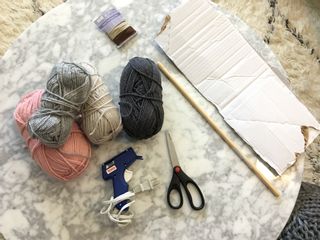
- Yarn (in whatever colors you want!)
- Wooden dowel cut to size* (again, to your discretion)
- Scissors
- Hot glue
- Suede cord*
- A piece of cardboard cut to the length you want the yarn to be*
Instructions #
*I didn't actually measure anything, I eyeballed everything lol
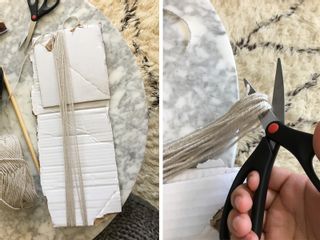
- Cut the yarn. Take your yarn and wrap it around the piece of cardboard length-wise several times. You will need a lot, obviously enough to run the length of your wooden dowel. If you're not sure if you have enough, wrap it around some more. Seriously. After you've wrapped it around the cardboard a zillion times, carefully slide the yarn off making sure you keep the loops intact. Cut the yarn on one side, severing the loop you've made. If you're using multiple colors, go ahead and do this for the other colors you need.
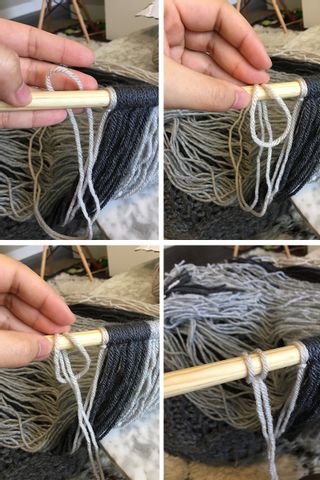
- Repeatedly tie yarn around your wooden dowel using a Lark's knot. This is literally all you do over and over to achieve these wall hangings. Fold a piece (or a bundle, as I did in the DIY below) of yarn in half, then pull the two loose ends through the center of the loop you made with the dowel in the center. You can slide the yarn around pretty easily, so you can kind of just adjust it and see how different colors look next to each other like I did.
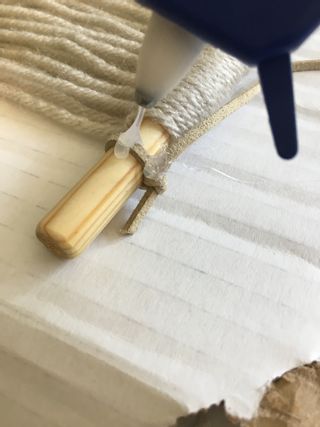
- Attach the suede cord so you can hang this baby up! I just arbitrarily lined up the suede cord and cut about a 24" piece to hang mine up. Whatever you measure, be sure to leave a little slack so you can tie it around the dowel. I also used hot glue to make sure it doesn't slip.
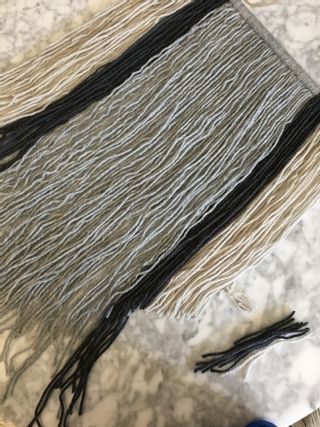
Trim your wall hanging. After you've covered the entire length of your dowel with yarn, make any adjustments as you see fit. The varying length can kind of look more organic, but for this, I went for a tapered V shape. A really good way to do this is to temporarily hang your wall hanging up using a push pin or something, and trim it as if you were giving it a haircut. Trust me, it's weird, but it totally works.
(Optional) Secure the yarn. I did this by gluing the back side of the yarn with hot glue.
And that's it! Now go hang up your masterpiece somewhere special.
Taking it a step further #
You could use the technique I described and get creative with the way your wall hangings look. Instead of a wooden dowel, you could use a shiny macrame hoop, like I did for this one:
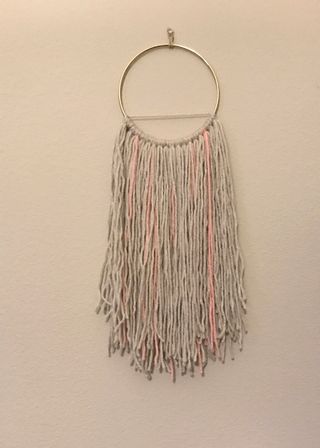
The only difference here is instead of tying individual pieces of yarn, I did bundles of 5 pieces each (mostly due to laziness). I still think it looks pretty good. I decided to tie a piece of yarn across the bottom of the hoop to jazz it up a bit.
The last wall hanging I made is my personal favorite. I think the layered effect looks so cool and gives it some textural interest:
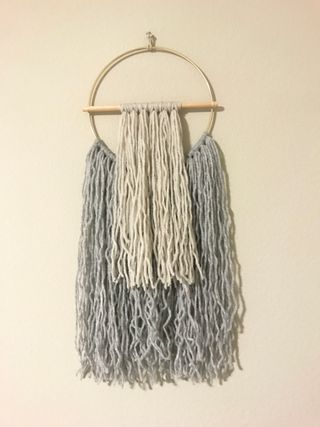
All I did was a cut a piece of a wooden dowel I had left to slightly overlap the center of the hoop. Then, I secured it with some white thread and hot glue (of course), like so:
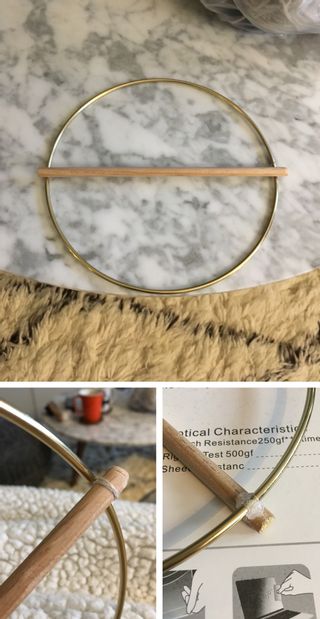
Then, you guessed it, I used that same Lark's Knot over and over to attach the yarn to the hoop and dowel.
That's pretty much it! You can get pretty creative with different colors and even try different types of yarn. I hope this was at least mildly helpful and inspired you to make your own.
Thanks for reading,
Christina